Webapck
Installation
Webpack基于Nodejs运行,首先确保已经安装了Nodejs。
初始化项目后,在项目中安装webpack
$ yarn add webpack --dev
- 将依赖安装在项目内,能够便于后续的webpack独立升级。
通常,webpack通过npm的脚本方式运行,将脚本加入到package.json文件中:
  "scripts": {
    "webpack": "webpack --config webpack.config.js"
  },
Getting Started
https://webpack.js.org/guides/getting-started/
Basic Setup
初始化基本的html和js文件
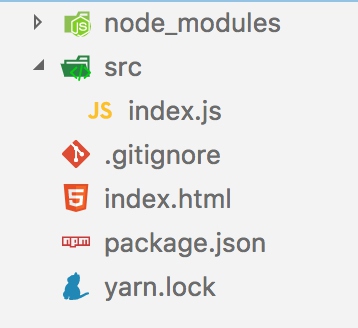
- index.html
<html>
  <head>
    <title>Getting Started</title>
    <script src="https://unpkg.com/lodash@4.16.6"></script>
  </head>
  <body>
    <script src="./src/index.js"></script>
  </body>
</html>
- src/index.js
function component() {
var element = document.createElement('div');
// Lodash, currently included via a script, is required for this line to work
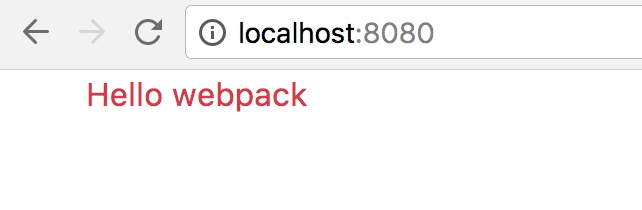
element.innerHTML = _.join(['Hello', 'webpack'], ' ');
return element;
}
document.body.appendChild(component());
- 通过这种传统方式管理js依赖,导致依赖混乱、难以维护、并且需要客户端下载多余的内容
Creating a Bundle
- 创建dist目录放置我们最终的发布文件
- 将index.html移动到dist目录中
- 使用包管理器安装lodash依赖
$ yarn add lodash - 修改index.js中的内容,通过es6的导入语法来引入lodash
import _ from 'lodash';

function component() {
  var element = document.createElement('div');

  element.innerHTML = _.join(['Hello', 'webpack'], ' ');

  return element;
}

document.body.appendChild(component());
- 修改index.html中的引用,删掉lodash的直接引入,将index.js的引入修改为即将生成的打包文件bundle.js
<html>
  <head>
    <title>Getting Started</title>
  </head>
  <body>
    <script src="./bundle.js"></script>
  </body>
</html>
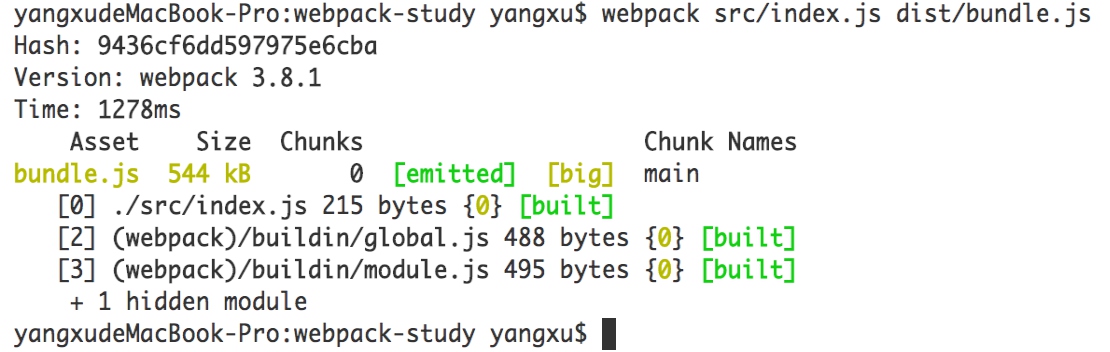
- 手动执行webpack打包命令,生成bundle.js
$ webpack src/index.js dist/bundle.js
Using a Configuration
通常情况下,我们的打包过程会更加复杂,需要单独的配置文件进行管理。
创建webpack.config.js
const path = require('path');

module.exports = {
  entry: './src/index.js',
  output: {
    filename: 'bundle.js',
    path: path.resolve(__dirname, 'dist')
  }
};
- 这里只包含了入口文件和输出文件
- 使用nodejs内置的path模块生成输出路径
- 调用webpack命令生成打包结果
$ webpack --config webpack.config.js
Asset Management
使用webpack加载样式、图片、字体等内容。
webpack使用动态绑定的方式,按需加载所需要的资源
Loading CSS
- 首先安装加载样式文件的loader
$ yarn add style-loader css-loader --dev
-
修改webpack的配置文件,将css文件使用对应的loader进行加载
- module中添加css文件的加载规则
- 通过test配置的正则表达式匹配对应的文件
- 使用style-loader和css-loader处理样式文件
const path = require('path');

module.exports = {
  entry: './src/index.js',
  output: {
    filename: 'bundle.js',
    path: path.resolve(__dirname, 'dist')
  },
  module: {
    rules: [
      {
        test: /\.css$/,
        use: [
          'style-loader',
          'css-loader'
        ]
      }
    ]
  }
};
- 添加styles.css文件
.hello {
  color: red;
}
- index.js文件中引入styles.css,以便webpack可以根据import语句加载样式
- index.js中给element添加class属性,使样式生效
import _ from 'lodash';
import './styles.css'

function component() {
  var element = document.createElement('div');

  element.innerHTML = _.join(['Hello', 'webpack'], ' ');
  element.classList.add('hello')

  return element;
}

document.body.appendChild(component());
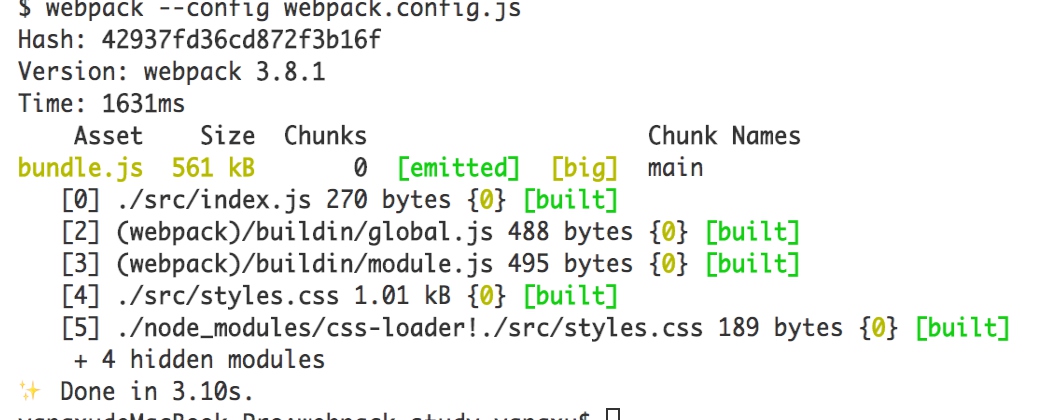
- 执行webpack打包,样式文件被加载到打包结果中
Loading Sass
https://webpack.js.org/loaders/sass-loader/
- 安装sass-loader
$ yarn add sass-loader node-sass --dev
- 添加rules加载sass
  {
    test: /\.scss$/,
    use: [
      'style-loader',
      'css-loader',
      'sass-loader'
    ]
  }
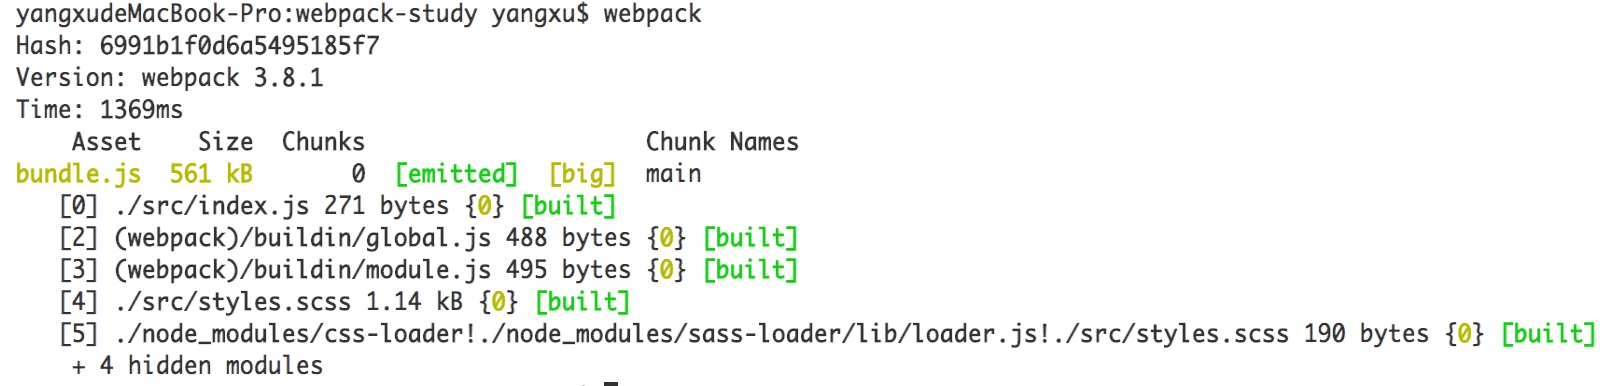
- 将styles改写为scss格式
- 执行webpack进行打包
加载bootstrap
- 安装bootstrap v4
$ yarn add bootstrap@next
- 在styles.scss中引入bootstrap,为了正确使用bootstrap提供的各种变量和宏,引入scss源文件
@import '~bootstrap/scss/bootstrap';

.hello {
  color: $red;
}
- 修改index.js文件,增加bootstrap的container
  element.classList.add('container')
  element.classList.add('hello')
- 执行打包
Loading Images
- 安装file-loader来加载图片文件
$ yarn add file-loader --dev
- 添加rules来处理图片
  {
    test: /\.(png|svg|jpg|gif)$/,
    use: [
      'file-loader'
    ]
  }
- 添加图标
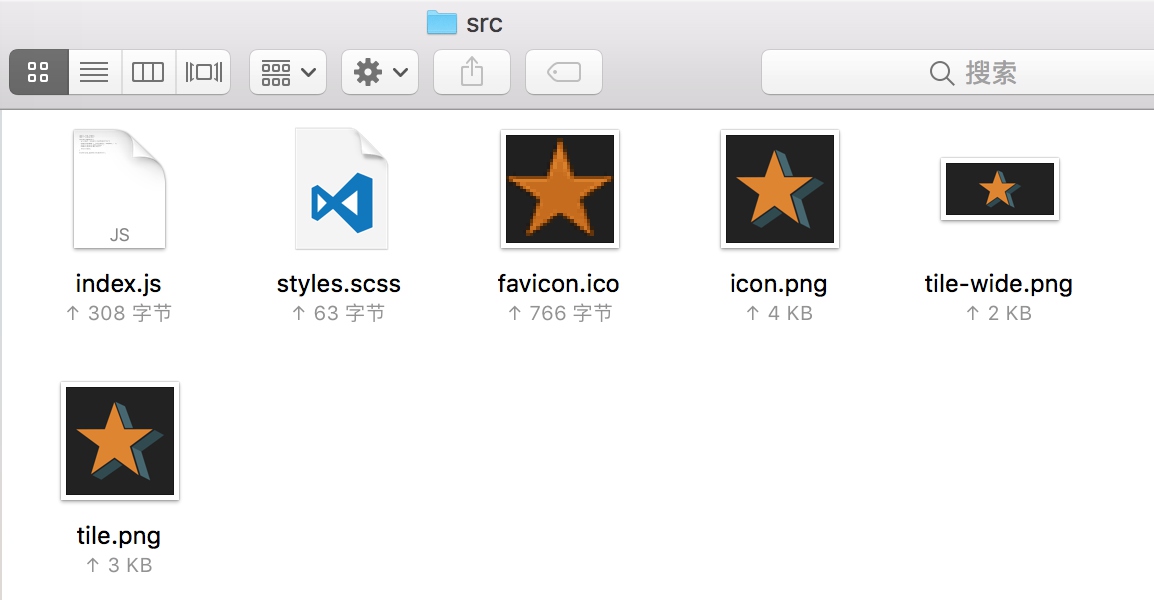
- 默认情况下,没有使用的图片不会被打包,需要在js用引入、在css中使用或者在html中加载
.hello {
  color: $red;
  background-image: url('./tile-wide.png');
}
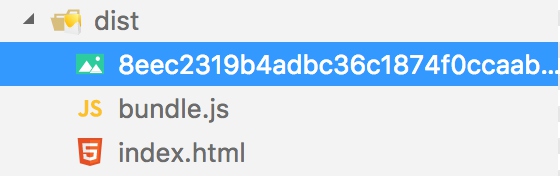
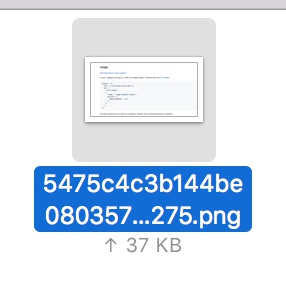
- 执行打包,文件被复制并重命名,样式中的引用被自动替换
压缩图片
图片在打包过程中,通常需要进行压缩处理
打包前
- 安装image-webpack-loader
$ yarn add image-webpack-loader --dev
- 配置rules
- 执行打包,文件从139k压缩到37k
Loading fonts
- 使用file-loader加载字体文件
  {
    test: /\.(woff|woff2|eot|ttf|otf)$/,
    use: [
      'file-loader'
    ]
  }
- 下载字体并修改样式文件
@import '~bootstrap/scss/bootstrap';

@font-face {font-family: "DuperWeb W03 Italic";
  src: url("./fonts/32614b2a79096b7abe08dce827de3d8f.eot"); /* IE9*/
  src: url("./fonts/32614b2a79096b7abe08dce827de3d8f.eot?#iefix") format("embedded-opentype"), /* IE6-IE8 */
  url("./fonts/32614b2a79096b7abe08dce827de3d8f.woff2") format("woff2"), /* chrome、firefox */
  url("./fonts/32614b2a79096b7abe08dce827de3d8f.woff") format("woff"), /* chrome、firefox */
  url("./fonts/32614b2a79096b7abe08dce827de3d8f.ttf") format("truetype"), /* chrome、firefox、opera、Safari, Android, iOS 4.2+*/
  url("./fonts/32614b2a79096b7abe08dce827de3d8f.svg#DuperWeb W03 Italic") format("svg"); /* iOS 4.1- */
}

.hello {
  font-family: 'DuperWeb W03 Italic';
}
- 执行打包,字体被加载到输出目录
Loading Data
- 安装csv-loader和xml-loader
$ yarn add csv-loader xml-loader --dev
- 创建用于测试的xml文件
<?xml version="1.0" encoding="UTF-8"?>
<note>
  <to>Mary</to>
  <from>John</from>
  <heading>Reminder</heading>
  <body>Call Cindy on Tuesday</body>
</note>
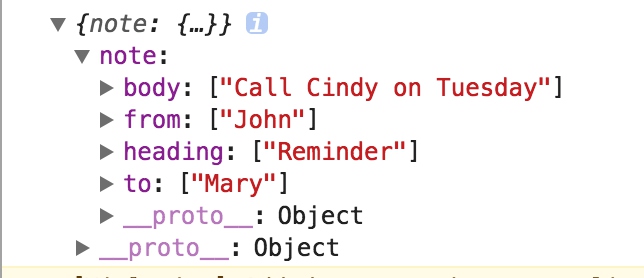
- js文件中import文件并打印内容
import _ from 'lodash';
import './styles.scss';
import data from './data.xml'

function component() {
  var element = document.createElement('div');

  element.innerHTML = _.join(['Hello', 'webpack'], ' ');
  element.classList.add('container')
  element.classList.add('hello')

  console.log(data);

  return element;
}

document.body.appendChild(component());
- 执行打包,查看输出结果(xml文件内容被内联到js脚本中)
Output Management
目前为止,我们是通过手动引入的方式在维护index.html中的引用。随着项目的增大,会将文件分为多个bundle输出,而且需要增加hash,自动维护index.html中的更新。
Preparation
- 新增一个print.js文件,当点击页面按钮的时候,在控制台打印信息
export default function print() {
  console.log('I am pringting message');
}
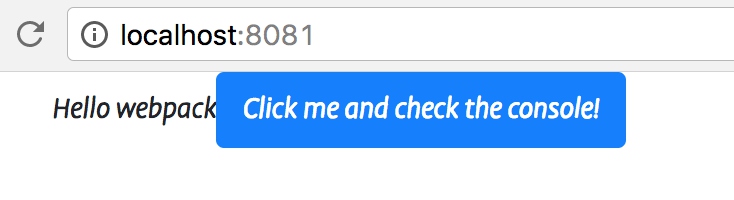
- index.js中新增按钮,点击时调用print的方法
  var btn = document.createElement('button')
  btn.classList.add('btn')
  btn.classList.add('btn-primary')
  btn.innerHTML = 'Click me and check the console!';
  btn.onclick = printMe;

  element.appendChild(btn)
- 分为两个包输出打包结果,修改webpack配置文件
  entry: {
    app: './src/index.js',
    print: './src/print.js'
  },
  output: {
    filename: '[name].js',
    path: path.resolve(__dirname, 'dist')
  },

- 但是我们需要手动修改index.html文件,来引入新生成的js文件
<body>
  <script src="./print.js"></script>
  <script src="./app.js"></script>
</body>
Setting up HtmlWebpackPlugin
- 安装依赖
$ yarn add html-webpack-plugin --dev
- webpack配置中添加插件
  plugins: [
    new HtmlWebpackPlugin({
      title: 'Output Management'
    })
  ]
- 执行打包后,自动生成index.html,覆盖掉我们在dist中手动维护的同名文件,并且根据配置项自动生成了title
<!DOCTYPE html>
<html>

<head>
  <meta charset="UTF-8">
  <title>Output Management</title>
</head>

<body>
  <script type="text/javascript" src="app.js"></script>
  <script type="text/javascript" src="print.js"></script>
</body>

</html>
Cleaning up the /dist folder
每次我们执行打包的时候,dist中的文件没有清除,如果是同名会覆盖,但是其他文件会被遗留下来,通过插件来进行自动清理。
- 安装依赖
$ yarn add clean-webpack-plugin --dev
- 配置webpack插件
  plugins: [
    new CleanWebpackPlugin('./dist'),
    new HtmlWebpackPlugin({
      title: 'Output Management'
    })
  ]
- 执行打包,可以看到控制台输出,而且在ide中也能看到目录有被清空的过程
$ webpack --config webpack.config.js
clean-webpack-plugin: /Users/yangxu/Documents/projects/demo/webpack-study/dist has been removed.
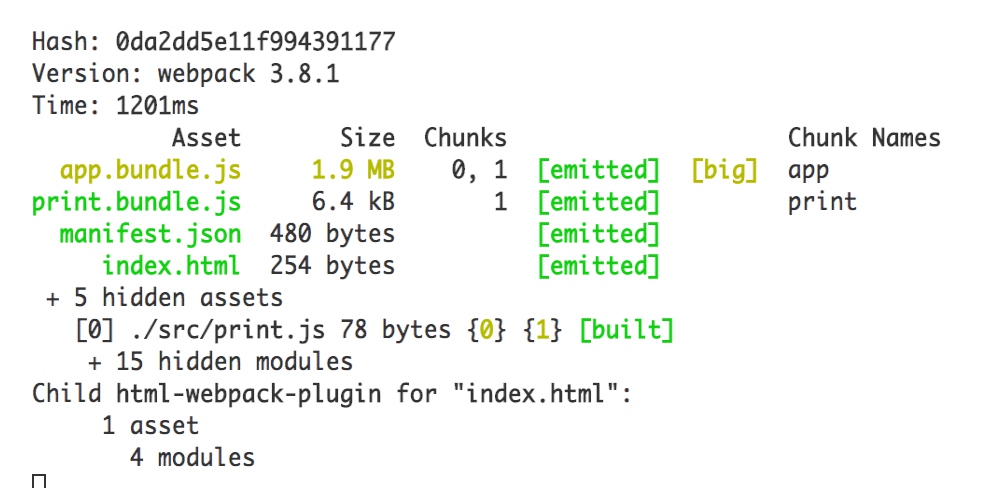
The Manifest
webpack通过一个manifest文件来记录那些文件已经被打包,避免重复生成。可以通过插件来将manifest生成为独立的json文件,以便我们探索webpack的生成过程。
- 安装依赖
$ yarn add webpack-manifest-plugin --dev
- 配置插件
  plugins: [
    new ManifestPlugin(),
  ]
- 执行打包,生成manifest文件
{
  "32614b2a79096b7abe08dce827de3d8f.eot": "411ad8ba151412a129561712cfd5b33e.eot",
  "32614b2a79096b7abe08dce827de3d8f.svg": "677433a0892aaed7b7d2628c313c9775.svg",
  "32614b2a79096b7abe08dce827de3d8f.ttf": "32614b2a79096b7abe08dce827de3d8f.ttf",
  "32614b2a79096b7abe08dce827de3d8f.woff": "60500f8ba55a33b536b53d982a6bbd36.woff",
  "32614b2a79096b7abe08dce827de3d8f.woff2": "b78cdd1b72a799e280936eb369d94538.woff2",
  "app.js": "app.bundle.js",
  "print.js": "print.bundle.js"
}
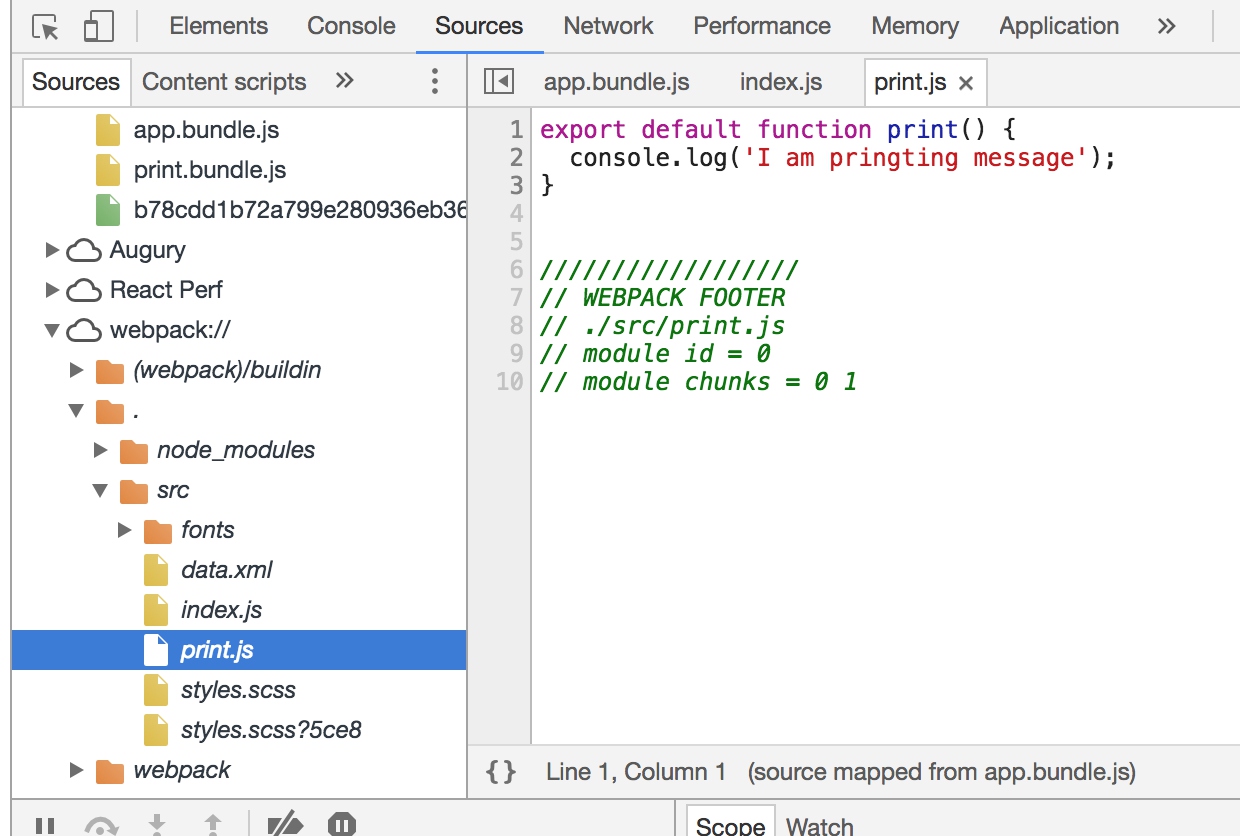
Development
Using source maps
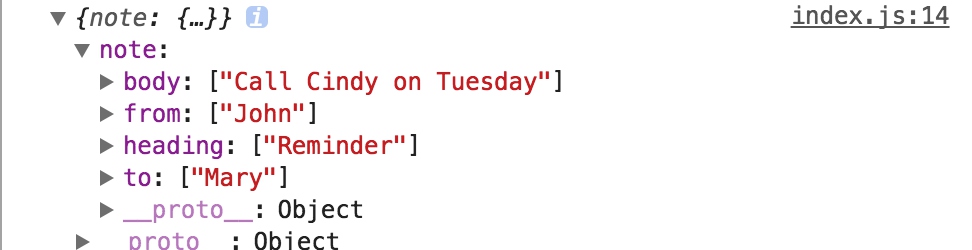
当文件被打包后,如果执行过程中出现错误,浏览器会指向到bundle文件,难以定位具体位置,通过启用sourcemap,来帮助我们日常开发中的快速定位。
在配置文件中加入一行:
devtool: 'inline-source-map',
重新打包后,刷新页面,可以看到控制台信息指向了实际的源码位置,Source页签中也能看到源码信息。以及断点调试功能。

Choosing a Development Tool
当我们修改文件后,需要手动执行打包和刷新,这会成为开发过程中的负担。有很多工具帮助我们自动完成这一工作:
- webpack’s Watch Mode
- webpack-dev-server
- webpack-dev-middleware
Using Watch Mode
在package.json中,添加执行脚本,使用webpack自带的命令行参数执行。
"watch": "webpack --watch --config webpack.config.js",
执行yarn watch后,控制台被阻塞并持续监听文件变化,执行自动打包。
文件保存之后,会很智能的刷新相关的bundle。
缺点是,打包完成后,我们依然需要手动刷新浏览器。
Using webpack-dev-server
这是我们最常用的方式,能够自动打包并刷新浏览器。
- 安装依赖
$ yarn add webpack-dev-server --dev
- 修改webpack配置文件
  devServer: {
    contentBase: './dist'
  },
- 配置启动脚本
"start": "webpack-dev-server --open",
- 执行脚本后,会自动打开浏览器,并且在每次修改之后,自动完成刷新动作
Using webpack-dev-middleware
webpack-dev-server内部是实现了一个server进程,监听文件变化并自动刷新。 这部分能力可以被独立为webpack-dev-middleware,需要创建一个server.js文件,并通过node启动
const express = require('express');
const webpack = require('webpack');
const webpackDevMiddleware = require('webpack-dev-middleware');

const app = express();
const config = require('./webpack.config.js');
const compiler = webpack(config);

// Tell express to use the webpack-dev-middleware and use the webpack.config.js
// configuration file as a base.
app.use(webpackDevMiddleware(compiler, {
  publicPath: config.output.publicPath
}));

// Serve the files on port 3000.
app.listen(3000, function () {
  console.log('Example app listening on port 3000!\n');
});
Hot Module Replacement
Hot Module Replacement (or HMR) is one of the most useful features offered by webpack. It allows all kinds of modules to be updated at runtime without the need for a full refresh.
HMR is not intended for use in production, meaning it should only be used in development
Enabling HMR
- 修改配置文件,启用web-dev-server内置的hmr能力
- 或者通过命令行开启(webpack-dev-server –hotOnly)
- 修改print.js文件,查看控制台输出(注意:如果使用省略扩展名的方式import进来,accept中需要使用相同的格式)

Gotchas
上面的例子中,虽然控制台打印了新的内容,但是如果点击按钮,会发现执行的还是旧方法。
原因是onclick事件绑定的依然是旧的方法,想让方法生效,需要在accept之后,手动更新页面元素。
let element = component()
document.body.appendChild(element)

if (module.hot) {
  module.hot.accept('./print', function() {
    console.log('Accepting the updated printMe module!');
    document.body.removeChild(element)
    element = component()
    document.body.appendChild(element)
  });
}
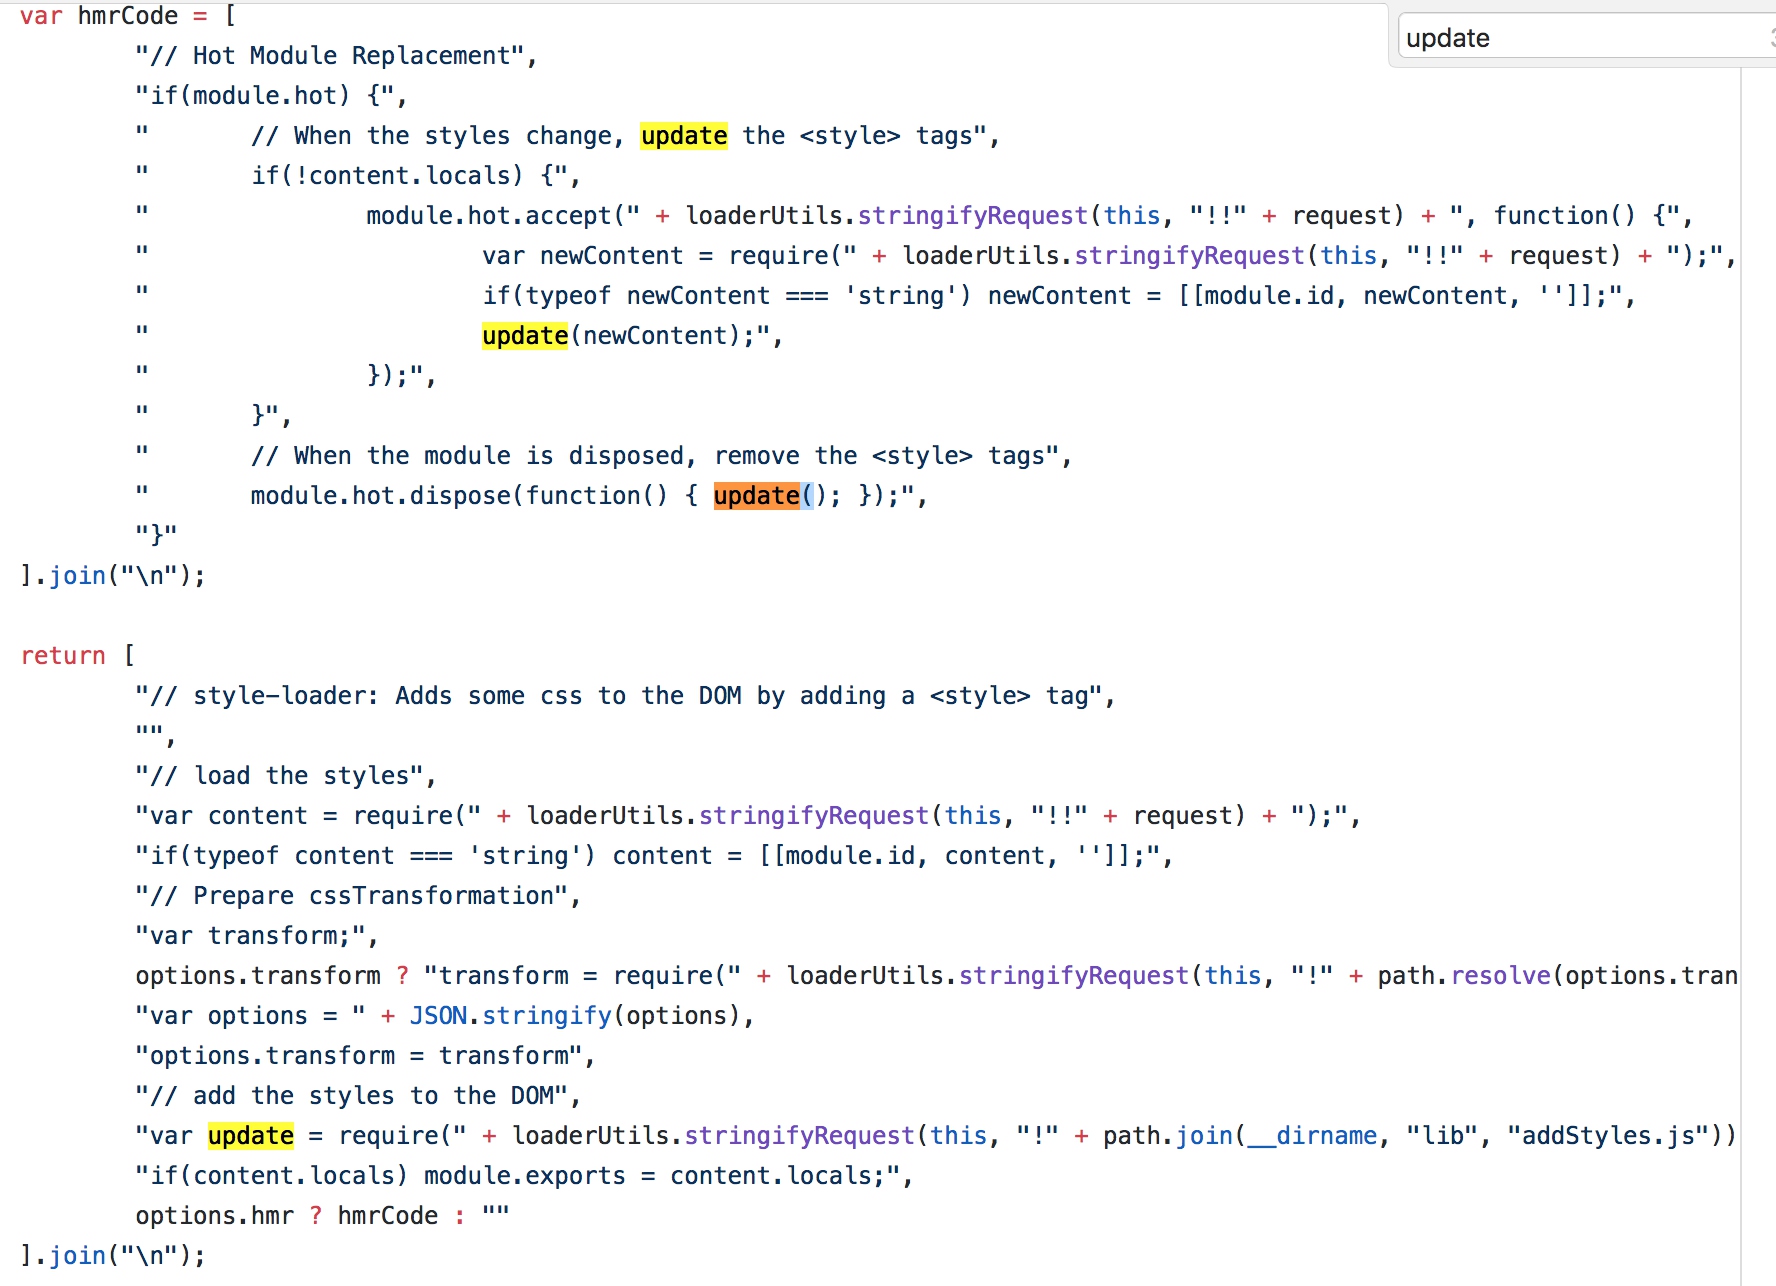
HMR with Stylesheets
样式的hmr更为简单,借助style-loader内部实现的accept,在样式发生变化后,会自动更新样式。
https://github.com/webpack-contrib/style-loader/blob/378e90637f1c2c30bff026d7f92bdc82d9d4ecb8/index.js

Other Code and Frameworks
前面的js文件加载还是比较繁琐,实际上有很多可用的工具已经帮助我们实现了自动加载功能。可以看到,其中主要是对流行框架的支持,这种支持也是我们选择框架的原因。
- React Hot Loader: Tweak react components in real time.
- Vue Loader: This loader supports HMR for vue components out of the box.
- Elm Hot Loader: Supports HMR for the Elm programming language.
- Redux HMR: No loader or plugin necessary! A simple change to your main store file is all that’s required.
- Angular HMR: No loader necessary! A simple change to your main NgModule file is all that’s required to have full control over the HMR APIs.
How it works
https://webpack.js.org/concepts/hot-module-replacement/
HMR的作用
- 保留当前页面状态,避免整体刷新后丢失
- 节省开发时间
- 实施看到样式变化
How It Works
通过不同的视角来解释HMR是如何工作的:
In the Application
- 应用程序让HMR去检查更新
- HMR异步下载更新并通知应用程序
- 应用程序让HMR去提交更新
- HMR同步刷新变更内容
In the Compiler
当文件发生变化后,会更新两部分内容:
- manifest文件
- 打包结果文件
manifest中的hash码会发生变化,webpack通过文件id和hash发现文件的更新。
In a Module
HMR是一个可选的功能,仅仅对于包含HMR代码(accept)的模块生效。例如style-loader中的实现,发生变化后,通过HMR的api来替换旧内容。
通常来说,我们不会在所有代码中都包含HMR代码,在实际的过程中,如果某个模块没有处理HMR,那么更新事件会冒泡上去,位于某个位置的handler可以处理某个module的更新,在webpack内部的依赖树上,这个更新会导致所有依赖都会更新。
In the Runtime
在模块的运行时,会有额外的代码被加入,用来监听模块的父模块和子模块。包含check和apply两个方法。
check方法会发起HTTP请求,教研manifest文件,如果没有更新,请求会失败。如果请求成功,更新后的chunks会被下载。
当所有文件下载完成后,运行时会切换到ready状态,准备替换所有更新。
apply方法先将所有需要更新的模块状态设置为invalid,在每个需要更新的模块中,需要在他自身或者他的父模块中,包含handler处理,否则更新事件不会生效。
如果事件始终没有被捕获,通过entry流出,更新过程失败。
如果事件被某个模块的handler捕获并更新,这个模块以及依赖他的子模块都会进行刷新。
当所有的过期模块都被处理完成后,运行时会切换回idle状态,应用继续使用。
- https://webpack.js.org/api/hot-module-replacement/
Tree Shaking
Tree Shaking技术基于ES2015的静态结构进行分析,提出无用的代码,缩减压缩包的体积。
Add a Utility
- 添加一个简单的计算函数模块
export function square(x) {
  return x * x;
}

export function cube(x) {
  return x * x * x;
}
- 在index.js中调用其中一个方法
element.innerHTML = _.join(['Hello', 'webpack', '5 cubed is equal to ' + cube(5)], ' ');
- square方法是没有被使用的,但是也会被打包到最后的结果中,导致整体包的体积被撑大
Minify the Output
- 安装插件uglifyjs-webpack-plugin
$ yarn add uglifyjs-webpack-plugin --dev
- 修改配置文件
new UglifyJSPlugin(),
- 执行打包后,不仅多余的square方法被移除,而且打包结果被混淆压缩,大大缩减了包的体积
Production
在webpack打包的时候,面对生产环境和开发环境是两种截然不同的方案。
- 开发环境 - 考虑自动打包、自动刷新、sourcemap映射、HMR等有利于提高开发效率的工作
- 生产环境 - 考虑最小化打包结果、压缩资源、消除sourcemap映射等方案,以便于用户使用时能够快速下载
在配置webpack的时候,通常会分别配置两份文件,同时借助webpack-merge的帮助,提取公共部分配置,避免重复。
- 安装webpack-merge
$ yarn add webpack-merge --dev
- 将配置文件分解为common、dev、prod三分,通过webpack-merge进行合并
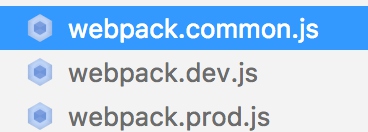
// webpack.common.js

const path = require('path');
const HtmlWebpackPlugin = require('html-webpack-plugin')
const CleanWebpackPlugin = require('clean-webpack-plugin')
const ManifestPlugin = require('webpack-manifest-plugin')
const webpack = require('webpack')
const UglifyJSPlugin = require('uglifyjs-webpack-plugin');


module.exports = {
  entry: {
    app: './src/index.js'
  },
  output: {
    filename: '[name].bundle.js',
    path: path.resolve(__dirname, 'dist')
  },
  module: {
    rules: [
      {
        test: /\.css$/,
        use: [
          'style-loader',
          'css-loader'
        ]
      },
      {
        test: /\.scss$/,
        use: [
          'style-loader',
          'css-loader',
          'sass-loader'
        ]
      },
      {
        test: /\.(png|svg|jpg|gif)$/,
        use: [
          'file-loader',
          {
            loader: 'image-webpack-loader',
            options: {
              bypassOnDebug: true,
            },
          },
        ]
      },
      {
        test: /\.(woff|woff2|eot|ttf|otf)$/,
        use: [
          'file-loader'
        ]
      },
      {
        test: /\.(csv|tsg)$/,
        use: [
          'csv-loader'
        ]
      },
      {
        test: /\.xml$/,
        use: [
          'xml-loader'
        ]
      }
    ]
  },
  plugins: [
    new CleanWebpackPlugin('./dist'),
    new HtmlWebpackPlugin({
      title: 'Output Management'
    }),
  ]
};
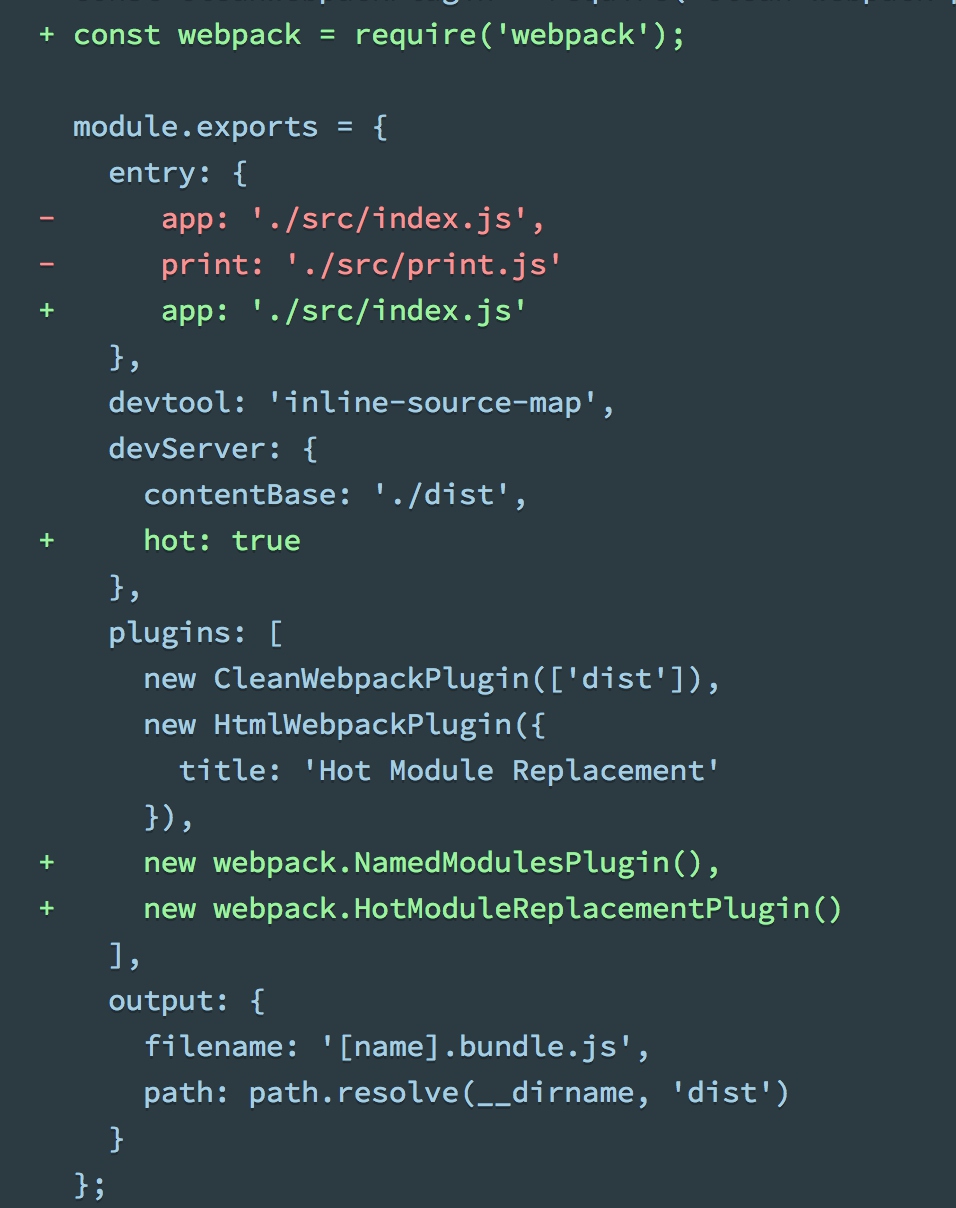
// webpack.dev.js
const ManifestPlugin = require('webpack-manifest-plugin')
const webpack = require('webpack')

const merge = require('webpack-merge');
const common = require('./webpack.common.js');

module.exports = merge(common, {
  devtool: 'inline-source-map',
  devServer: {
    contentBase: './dist',
    hot: true
  },
  plugins: [
    new ManifestPlugin(),
    new webpack.NamedModulesPlugin(),
    new webpack.HotModuleReplacementPlugin()
  ]
})
// webpack.prod.js

const UglifyJSPlugin = require('uglifyjs-webpack-plugin');
const merge = require('webpack-merge');
const common = require('./webpack.common.js');

module.exports = merge(common, {
  plugins: [
    new UglifyJSPlugin(),
  ]
})
- 修改npm脚本,使用dev和build分别加载不同的配置文件
  "scripts": {
 "start": "webpack-dev-server --open --config webpack.dev.js",
 "build": "webpack --config webpack.prod.js"
  },
Specify the Environment
很多的库会检查process.env.NODE_ENV变量的值来区分生产环境和开发环境。
不同的设置会导致不同的处理方式。
如果每次都通过命令行传递,不便于开发人员使用。
可以通过内置的 DefinePlugin 配置到prod两个文件内。
const webpack = require('webpack')
const UglifyJSPlugin = require('uglifyjs-webpack-plugin');
const merge = require('webpack-merge');
const common = require('./webpack.common.js');

module.exports = merge(common, {
  plugins: [
    new UglifyJSPlugin(),
    new webpack.DefinePlugin({
      'NODE_ENV': JSON.stringify('production')
    })
  ]
})
Contrary to expectations, process.env.NODE_ENV is not set to “production” within the build script webpack.config.js, see #2537.
在程序源码中,可以通过如下代码处理生产环境的逻辑:
 if (process.env.NODE_ENV !== 'production') {
   console.log('Looks like we are in development mode!');
 }
Code Splitting
代码分割是webpack的关键能力,可以帮助我们将应用打包到多个chunk中,便于我们更好的控制加载过程、提高应用的加载速度。
有三种方式帮助我们进行分割:
- Entry Points: 通过entry进行手动分割.
- Prevent Duplication: 使用CommonsChunkPlugin提取重复的chunk.
- Dynamic Imports: 在模块中通过内联方法分割.
Entry Points
最简单的分割方式:
  entry: {
    app: './src/index.js',
    print: './src/print.js'
  },
缺点是:
- 多个chunk之间的重复引入没有处理
- 不够灵活,不能根据代码的结构进行动态调整
Prevent Duplication
借助CommonsChunkPlugin插件,自动提取多个chunk之间的重复部分。
- 修改print.js使他和index.js同样引入lodash
import _ from 'lodash'

export default function print() {
  console.log(_.join(['Printing', 'message'], ' '))
}
- 配置插件
    new webpack.optimize.CommonsChunkPlugin({
      name: 'common' // Specify the common bundle's name.
    })
- 执行打包,一个额外的common被自动提取,包含两者之间的重复依赖

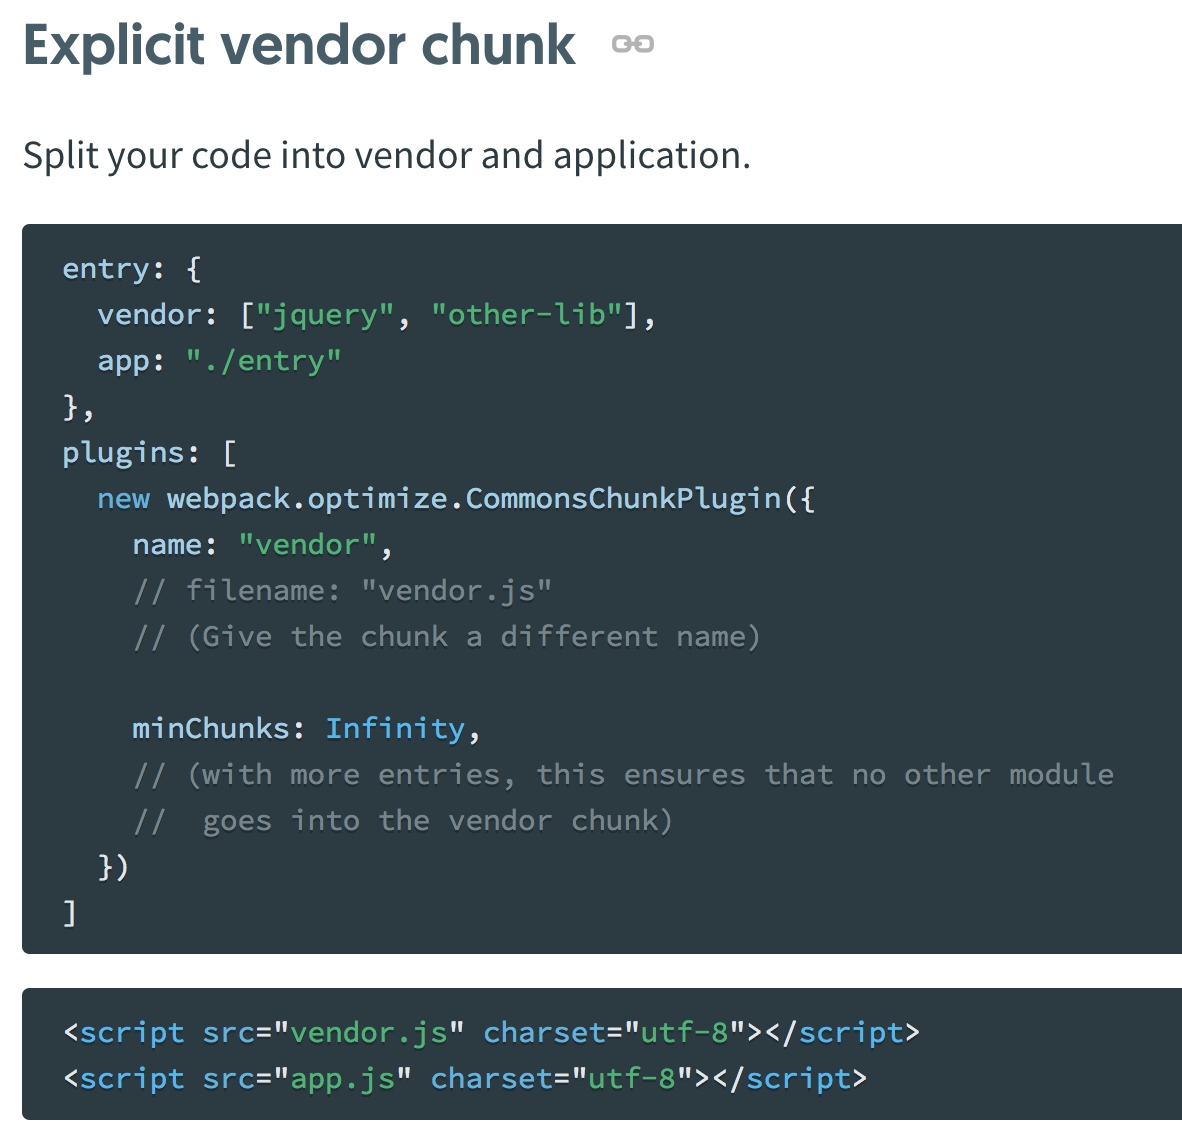
The CommonsChunkPlugin is also used to split vendor modules from core application code using explicit vendor chunks.
Dynamic Imports
借助ES2015的import()语法来标识动态加载。
import() calls use promises internally. If you use import() with older browsers, remember to shim Promise using a polyfill such as es6-promise or promise-polyfill.
- 首先移除掉通过entry分割的配置,chunkFilename是用来声明‘没有配置在entry中的chunk的命名规则’
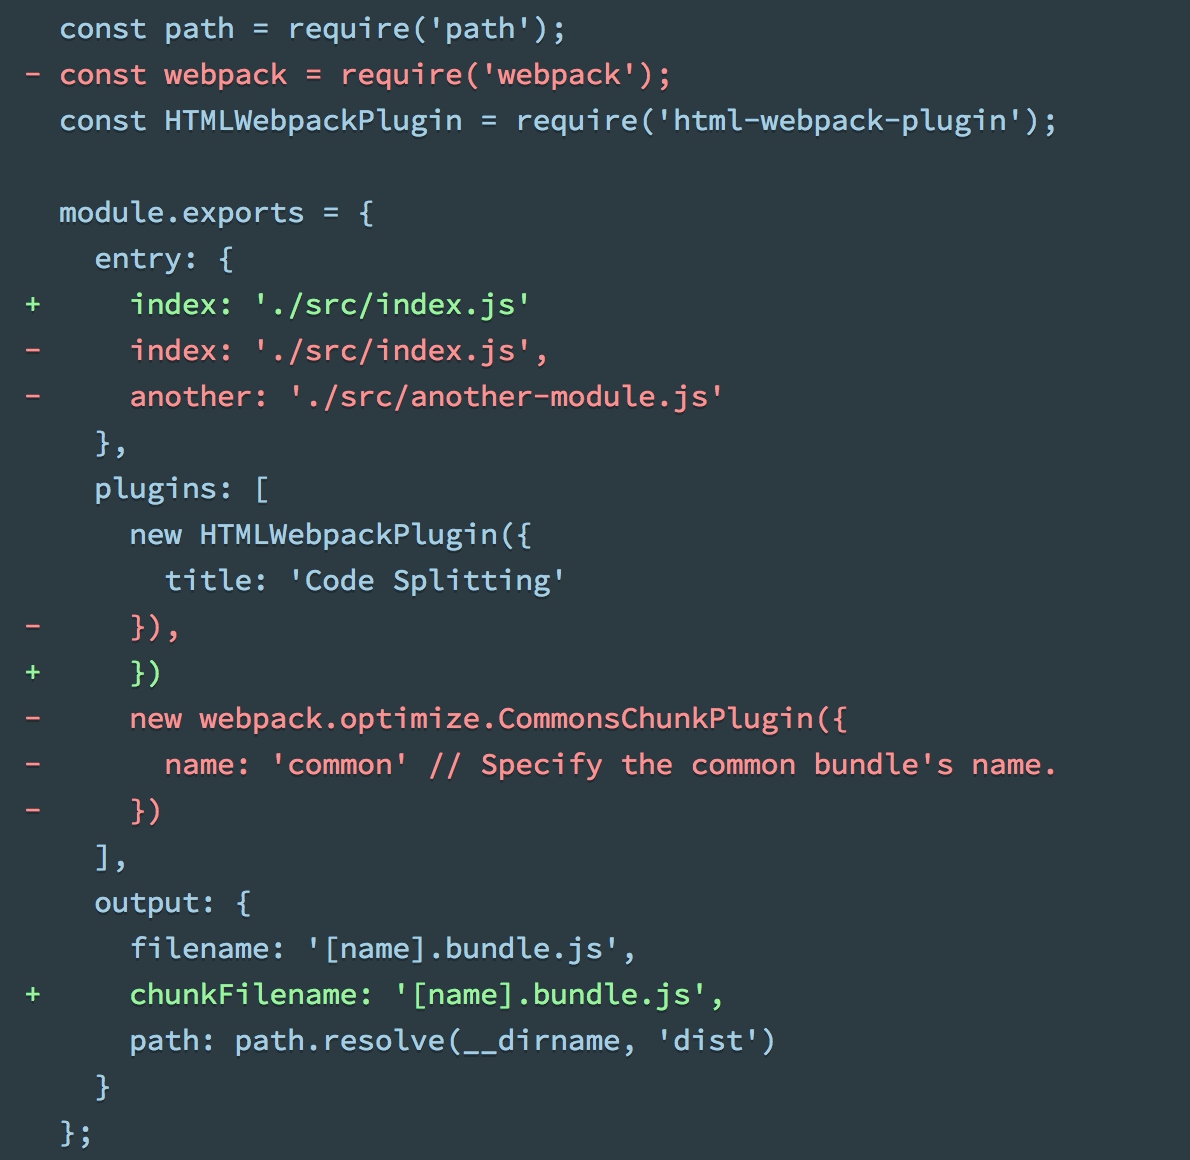
- 修改index.js文件,使用动态加载方式获取依赖
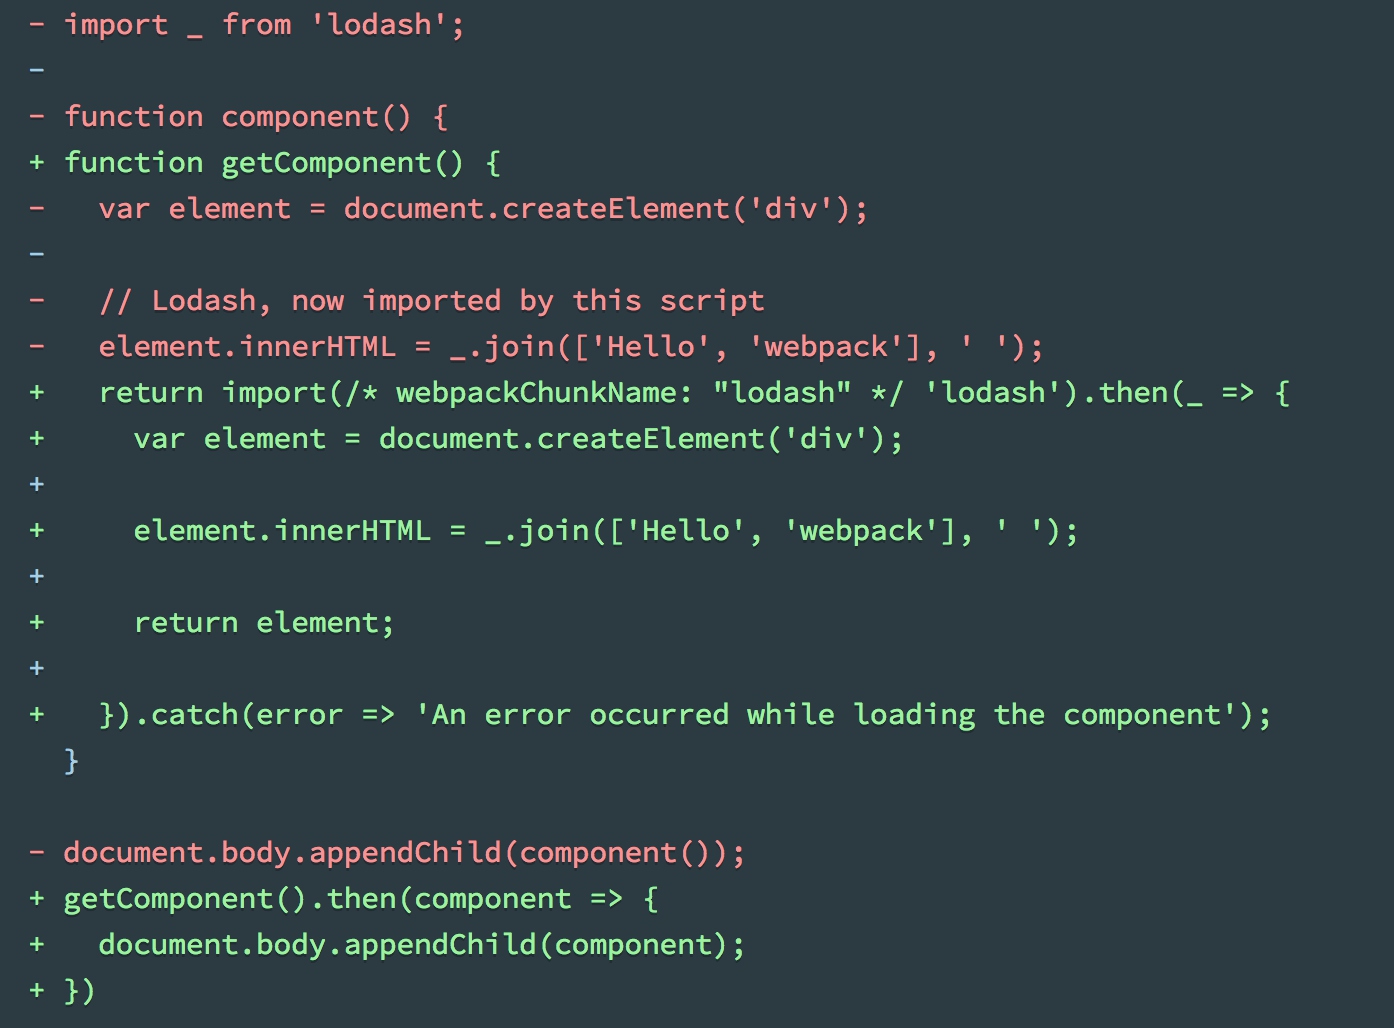
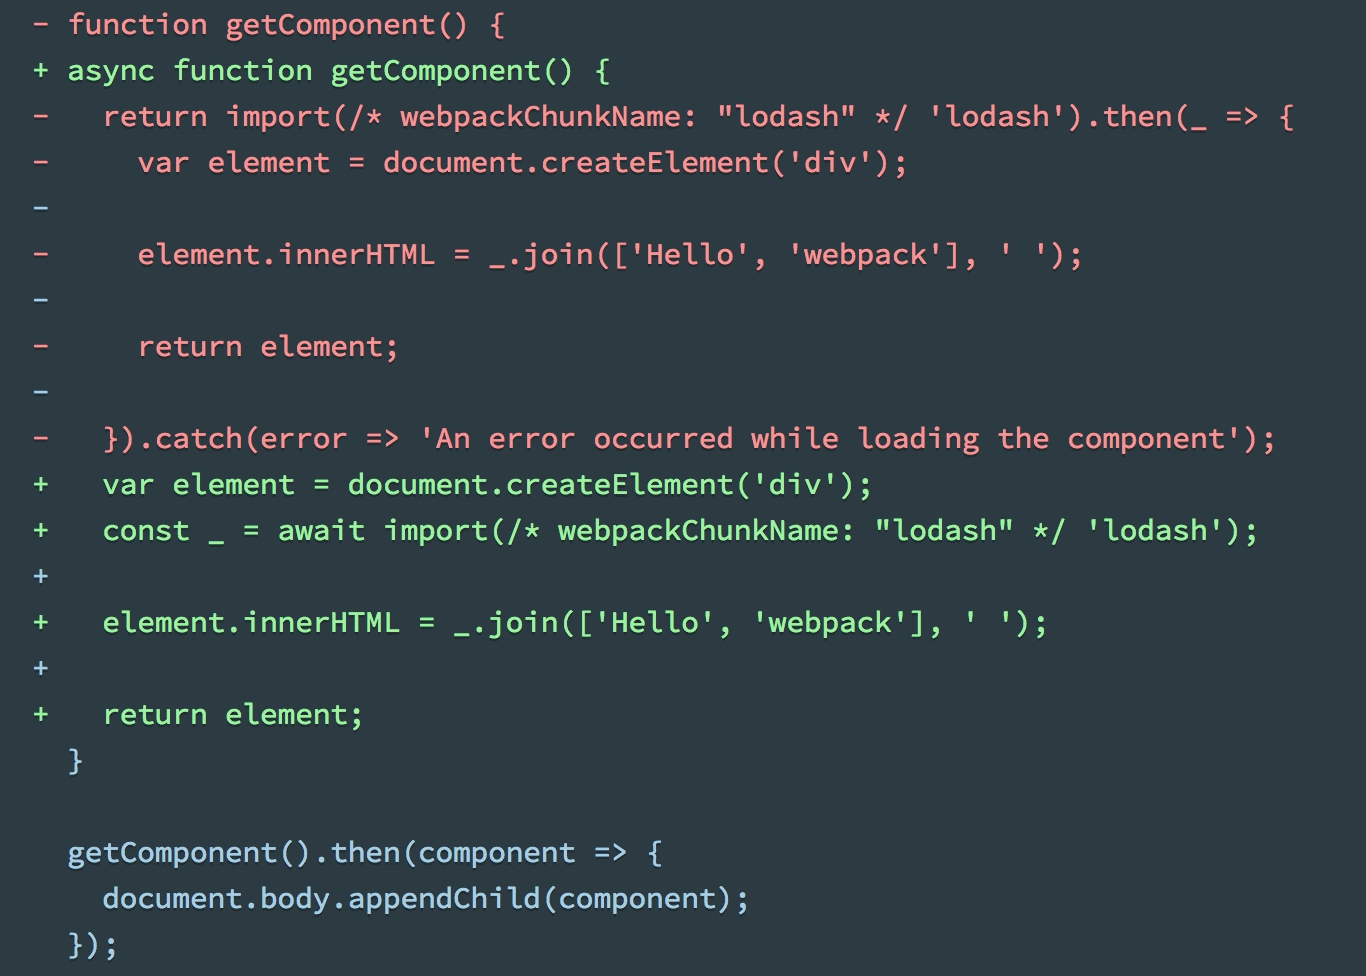
/* webpackChunkName: "lodash" */语句用来给chunk命名- 如果使用预处理插件支持async语法,可以修改index.js的写法
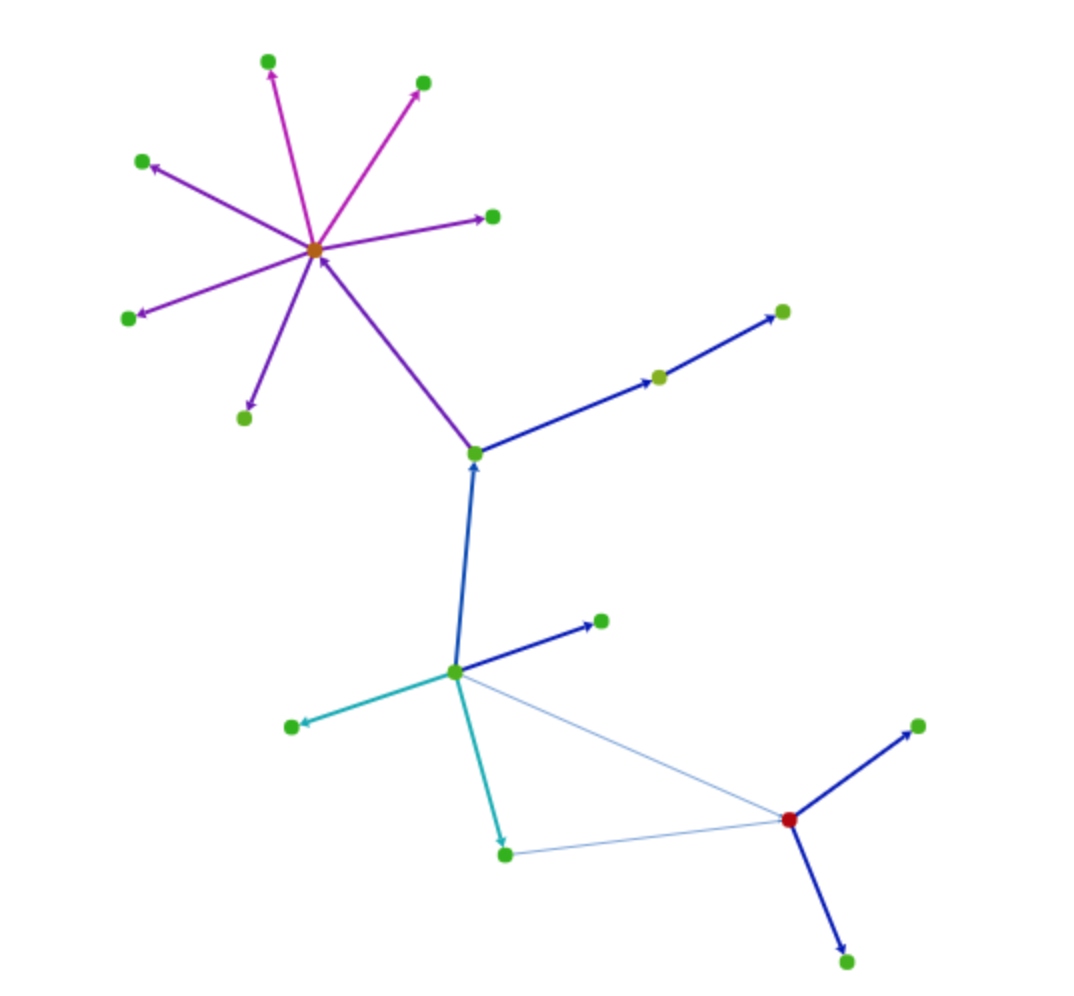
Bundle Analysis
分割代码后,可以通过工具来分析包的划分
- 官方分析工具 http://webpack.github.io/analyse
- webpack-chart: Interactive pie chart for webpack stats.
- webpack-visualizer: Visualize and analyze your bundles to see which modules are taking up space and which might be duplicates.
- webpack-bundle-analyzer: A plugin and CLI utility that represents bundle content as convenient interactive zoomable treemap.
Lazy Loading
延迟加载或者称作按需加载,在应用中通过逻辑来控制加载点。使得应用程序的初始化速度提高,带来更好的用户体验。
我们希望默认不加载print.js的包,当点击按钮的时候,才去动态加载,修改index.js中的逻辑:
  btn.onclick = e => import(/* webpackChunkName: "print" */ './print').then(module => {
    const printMe = module.default
    printMe()
  });
通过注释,让webpack知道如何进行独立打包,并且在使用时,动态加载:
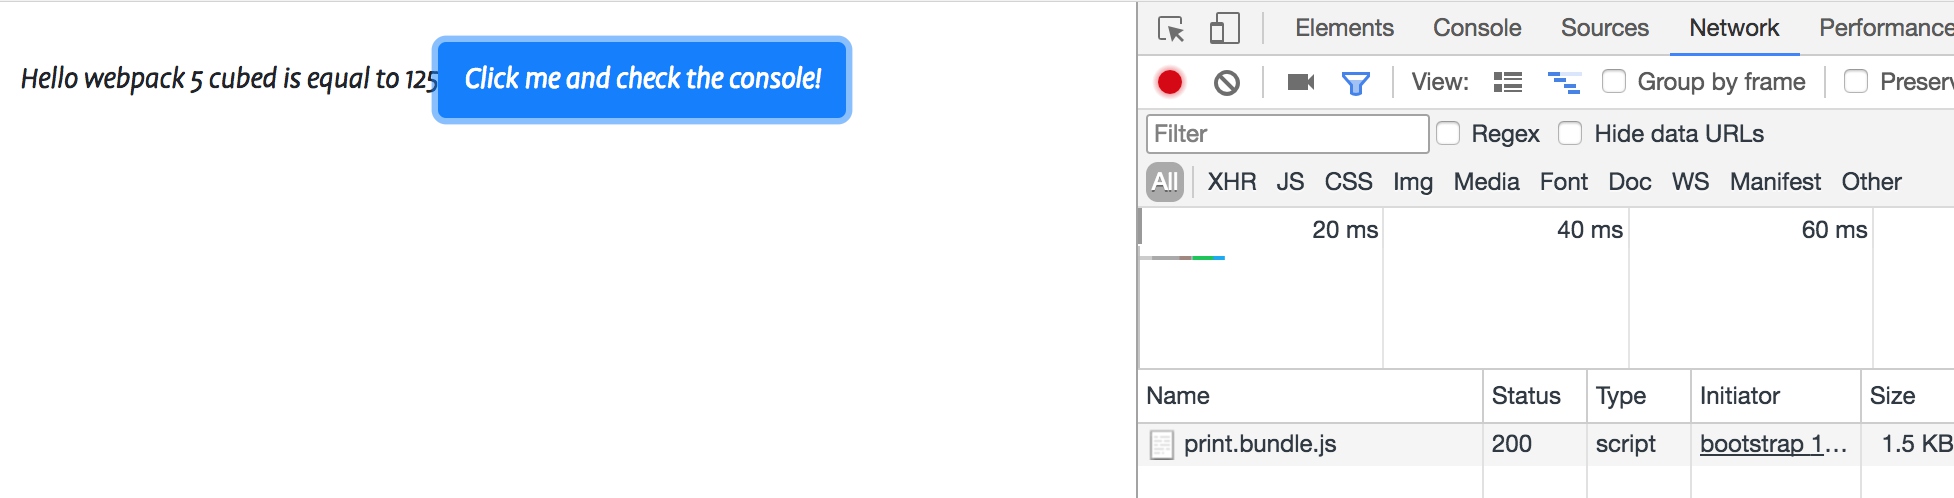
注意在webpack配置中,需要将print从entry中移除,否则会打包并在index.html中引入 output中需要给出chunk的命名规则,否则是按照数字id进行命名
  entry: {
    app: './src/index.js'
  },
  output: {
    filename: '[name].bundle.js',
    chunkFilename: '[name].bundle.js',
    path: path.resolve(__dirname, 'dist')
  },
Caching
当应用被打包发布的时候,会使用dist目录下的内容,客户端访问应用时,会加载dist目录下的资源。
为了加快访问速度和节省带宽,浏览器会使用缓存技术减少不必要的下载。
我们可以借助webpack的配置和各种插件,来帮助浏览器识别未改变的文件。
Output Filenames
在output中,通过[chunkhash]命名文件
  output: {
    filename: '[name].[chunkhash].js',
    chunkFilename: '[name].[chunkhash].js',
    path: path.resolve(__dirname, 'dist')
  },
执行打包后发现,文件名中,追加了基于内容计算出来的hash码,当文件没有发生变化时,文件名保持不变。

Extracting Boilerplate
借助 CommonsChunkPlugin 的帮助,将相对稳定的部分独立打包,尽量保持这个包的稳定,我们会:
- 提取webpack附加的代码模板
- 提取三方件
  entry: {
    app: './src/index.js',
    vender: [
      'lodash'
    ]
  },
  plugins: [
    new CleanWebpackPlugin('./dist'),
    new HtmlWebpackPlugin({
      title: 'Caching'
    }),
    new webpack.optimize.CommonsChunkPlugin({
      name: 'vender'
    }),
    new webpack.optimize.CommonsChunkPlugin({
      name: 'runtime'
    }),
  ]
注意:
- runtime需要给定一个,在entry中没有出现过的名字,插件会自动提取webpack的附加内容
- vender中包含三方件,并且插件配置要在runtime之前
Module Identifiers
首先记录我们之前的打包结果:
         print.575c0ed73ad5b58a2eb7.js  194 bytes       0  [emitted]         print
           app.7383f6a1b5ac5b35d5eb.js     157 kB       1  [emitted]         app
        vender.63e9981a8673418b3140.js    70.8 kB       2  [emitted]         vender
       runtime.1abd54b5b199a2033d70.js    1.48 kB       3  [emitted]         runtime
我们删除index.js中对math模块的引用并重新打包:

         print.ad0ea900f35e8c87d8ac.js  194 bytes       0  [emitted]         print
           app.652910fb7b51e94fb720.js     157 kB       1  [emitted]         app
        vender.8c33d5ec260e6b2ca268.js    70.8 kB       2  [emitted]         vender
       runtime.87bf998ccc0f7c3fb216.js    1.48 kB       3  [emitted]         runtime
结果发现,所有的hash结果都发生了变化,这与我们期望的是不相符的,原因是因为修改了引用顺序(math的依赖),导致各个module的id发生了变化,结果导致所有文件都被刷新。我们并不希望未改变的文件也出现变化,导致浏览器需要刷新所有缓存。解决方案有几个:
- NamedModulesPlugin 相对来说打包时间更长
- HashedModuleIdsPlugin 推荐使用
  plugins: [
    new UglifyJSPlugin(),
    new webpack.DefinePlugin({
      'NODE_ENV': JSON.stringify('production')
    }),
    new webpack.HashedModuleIdsPlugin(),
  ]
打包后对比两次的结果,只有修改的部分发生了变化,其余保持现状:
         print.c4424bacece5a6a4f313.js  203 bytes       0  [emitted]         print
           app.421317eb60fa42e6a16a.js     157 kB       1  [emitted]         app
        vender.769acd3b5b746266db1c.js    70.8 kB       2  [emitted]         vender
       runtime.86e12118465ad5e8b474.js    1.48 kB       3  [emitted]         runtime
         print.c4424bacece5a6a4f313.js  203 bytes       0  [emitted]         print
           app.233a67236e6777f58d22.js     157 kB       1  [emitted]         app
        vender.769acd3b5b746266db1c.js    70.8 kB       2  [emitted]         vender
       runtime.1d455a644fe47b800bba.js    1.48 kB       3  [emitted]         runtime
Shimming
在我们使用三方件的时候,可能三方类库是通过全局变量来提供使用的,我们需要通过webpack进行包装。 另一种使用的场景是为不同浏览器提供垫片,满足高级功能的使用。
Shimming Globals
我们在代码中删除对lodash的import,通过插件提供导入。

    new webpack.ProvidePlugin({
      lodash: 'lodash'
    })
Loading Polyfills
为了兼容多种低版本浏览器,通常使用垫片来补充浏览器能力。
- 安装babel-polyfill
$ yarn add babel-polyfill
- 创建polyfill.js文件,独立管理垫片的引入
import 'babel-polyfile'
- 在webpack中作为entry
  entry: {
    app: './src/index.js',
    polyfile: './src/polyfile',
    vender: [
      'lodash'
    ]
  },
TypeScript
TypeScript是JS的超集,并且提供了更好的静态类型检查。
- 安装ts和ts-loader
$ yarn add typescript ts-loader --dev
- 添加tsconfig.json文件,用来指定typescript的编译方式
{
  "compilerOptions": {
    "outDir": "./dist/",
    "noImplicitAny": true,
    "module": "es6",
    "target": "es5",
    "jsx": "react",
    "allowJs": true
  }
}
- 修改webpack配置文件,对ts文件进行处理
  entry: {
    app: './src/index.ts',
    vender: [
      'lodash'
    ]
  },
  resolve: {
    extensions: [ ".tsx", ".ts", ".js" ]
  },
  module: {
    rules: [
      {
        test: /\.css$/,
        use: [
          'style-loader',
          'css-loader'
        ]
      },
      {
        test: /\.tsx?$/,
        use: 'ts-loader',
        exclude: /node_modules/
      }
    ]
  }
Source Maps
在ts配置中添加sourcemap支持:
{
  "compilerOptions": {
    "outDir": "./dist/",
    "noImplicitAny": true,
    "module": "es6",
    "target": "es5",
    "jsx": "react",
    "allowJs": true,
    "sourceMap": true
  }
}
Using Third Party Libraries
使用三方件的时候,可以安装预定义的types文件给ts使用
$ yarn add @types/lodash --dev
其他三方件的types文件可以在官方搜索: http://microsoft.github.io/TypeSearch/
Importing Other Assets
如果想在ts中引入其他类型的文件,需要自定义custom.d.ts文件
declare module "*.svg" {
  const content: any;
  export default content;
}
Environment Variables
在执行webpack打包的时候,可以通过命令行参数将变量值传入打包脚本:
$ webpack --env.NODE_ENV=local --env.production --progress
Setting up your env variable without assignment, –env.production sets –env.production to true by default. There are also other syntaxes that you can use https://webpack.js.org/api/cli/#environment-options
如果在配置文件中想要使用dev变量,必须将module.exports从对象修改为函数:
module.exports = env => {
  // Use env.<YOUR VARIABLE> here:
  console.log('NODE_ENV: ', env.NODE_ENV) // 'local'
  console.log('Production: ', env.production) // true

  return {
    entry: './src/index.js',
    output: {
      filename: 'bundle.js',
      path: path.resolve(__dirname, 'dist')
    }
  }
Build Performance
General
遵循最佳实践,将配置文件分割为dev和prod两份,各自独立进行。
Stay Up to Date
保持webpack和nodejs的更新,以便享受新版本带来的性能提升
Loaders
保持loader配置中的范围限制,每次只加载最小分为的文件:
{
  test: /\.js$/,
  include: path.resolve(__dirname, "src"),
  loader: "babel-loader"
}
Bootstrap
每个插件或loader都有启动时间,尝试替换为其他工具
Resolving
- Minimize the number of items in resolve.modules, resolve.extensions, resolve.mainFiles, resolve.descriptionFiles as they increase the number of filesystem calls.
- Set resolve.symlinks: false if you don’t use symlinks (e.g. npm link or yarn link).
- Set resolve.cacheWithContext: false if you use custom resolving plugins, that are not context specific.
Dlls
使用DllPlugin来减少编译时间,但是会增加构建过程的复杂度。
Smaller = Faster
减少整体体积总是能提高编译速度,尽量保持包的精简:
- 使用更小的类库
- 在多页面应用中使用CommonsChunksPlugin
- 在多页面应用中使用CommonsChunksPlugin的async模式
- 移除无用代码
- 只编译开发中的代码
Worker Pool
使用thread-loader将耗时的loader过程在工作池中进行。
避免多度使用,进程间切换同样会带来性能开销。
Persistent cache
借助cache-loader启用持久缓存功能,缓存loader的处理结果
Note that there is an overhead for saving the reading and saving the cache file, so only use this loader to cache expensive loaders.
Custom plugins/loaders
自定义插件或loader来提高性能。
Development
Incremental Builds
使用内置的watch模式来监听文件变化,增量更新。
避免使用其他工具进行监听,并调用webpack。
In some setups watching falls back to polling mode. With many watched files this can cause a lot of CPU load. In these cases you can increase the polling interval with watchOptions.poll.
Compile in Memory
使用一下三种工具,在内存中进行编译:
- webpack-dev-server
- webpack-hot-middleware
- webpack-dev-middleware
Devtool
devtool的不同配置项会导致性能差异:
- eval 性能最好,但是无法追踪代码.
- cheap-source-map 性能也比较好,但是sourcemap交叉
- eval-source-map 增量构建时使用. => 大多数情况下 cheap-module-eval-source-map 是最合理的配置.
Avoid Production Specific Tooling
避免使用生产环境才用到的功能:
- UglifyJsPlugin
- ExtractTextPlugin
- [hash]/[chunkhash]
- AggressiveSplittingPlugin
- AggressiveMergingPlugin
- ModuleConcatenationPlugin
Minimal Entry Chunk
new CommonsChunkPlugin({
  name: "manifest",
  minChunks: Infinity
})
Passing
Infinityjust creates the commons chunk, but moves no modules into it.
Production
Don’t sacrifice the quality of your application for small performance gains! Keep in mind that optimization quality is in most cases more important than build performance.
Multiple Compilations
- parallel-webpack: 在worker pool中执行编译
- cache-loader: 缓存可以在多次编译之间共享.
Source Maps
关闭sourcemap功能
Specific Tooling Issues
- Babel 减少preset和plugin的数量
- Typescript
- Use the fork-ts-checker-webpack-plugin for type checking in a separate process.
- Configure loaders to skip typechecking.
- Use the ts-loader in happyPackMode: true / transpileOnly: true.
- Sass node-sass has a bug which blocks threads from the Node.js threadpool. When using it with the thread-loader set workerParallelJobs: 2.